
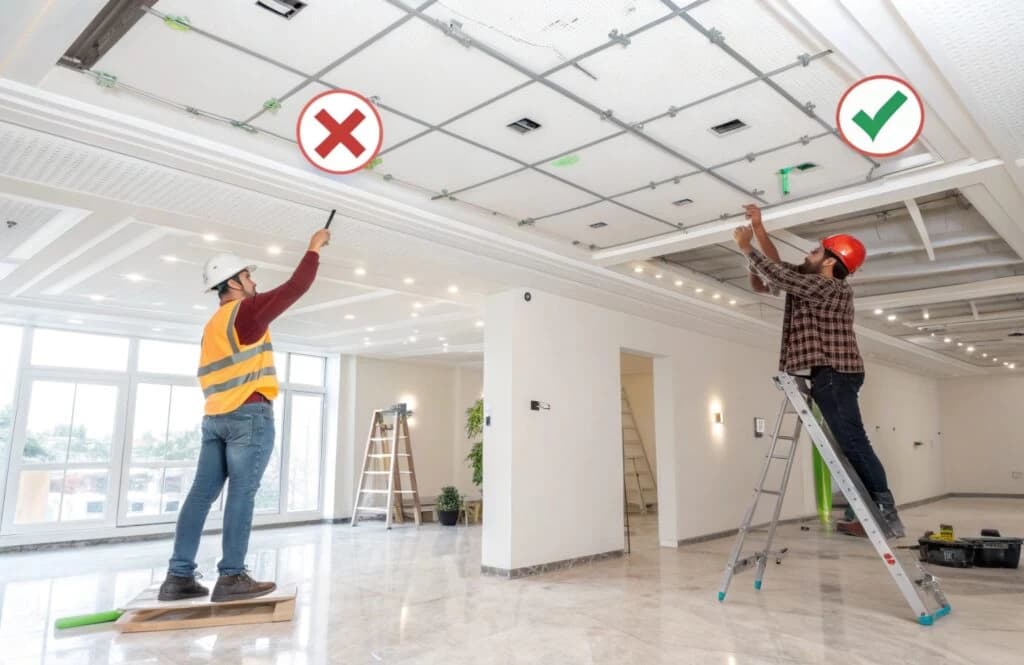
Installing a ceiling—whether it’s gypsum, POP, PVC, wooden panels, or a false ceiling—is a project that looks simple from the outside but requires precision, planning, and proper technique. Even a minor mistake during installation can lead to cracks, sagging, uneven surfaces, lighting issues, or expensive repairs later on.
If you’re renovating a small bedroom, designing a false ceiling for a new home, or updating an old ceiling, understanding the most common installation mistakes can save you money, time, and frustration. This comprehensive guide breaks down the errors that homeowners, contractors, and DIY enthusiasts often make, along with expert recommendations to ensure your ceiling looks perfect and lasts for years.
1. Poor Planning & Layout Mistakes
Ceiling installation begins before materials even arrive at your home. Proper planning determines the accuracy, alignment, and final finish of the ceiling. Unfortunately, many people rush into installation without preparing the basics.
a) Skipping Accurate Measurements
Incorrect measurements are the foundation of 90% of ceiling problems. Even a difference of half an inch can cause misaligned boards, uneven grid spacing, and visible gaps. This is especially crucial in small bedrooms, where single mistakes become more noticeable.
Always measure:
- wall-to-wall distances
- ceiling height
- fixture locations
- slope or uneven slab levels
Professional installers use laser levels and chalk lines to ensure precision—DIY installers should do the same.
b) Not Planning for Lighting, Ducting & Fixtures
One of the biggest issues homeowners face is installing the ceiling first and deciding the lighting later. This creates an unnecessarily complicated situation:
- Extra cutting weakens the boards
- Lighting holes become imperfect
- Wires are exposed
- Fixtures may misalign with the layout
Every light (LED panels, spotlights, cove lighting, fans) should be decided before ceiling work starts.
c) No Installation Blueprint or Layout Map
A ceiling layout map ensures that the grid lines, panels, and lighting placements align perfectly. Without a layout plan, installers guess the alignment—and guesswork always leads to inconsistency.
2. Material & Attachment Errors
Selecting the right material is only half the process; using it incorrectly leads to long-term issues.
a) Choosing the Wrong Material for the Room Environment
Not all materials are suitable for every space. For example:
- POP absorbs moisture and cracks in humid rooms
- Regular gypsum boards sag if exposed to dampness
- Wooden panels warp in high-humidity climates
- PVC discolors if placed near high heat sources
Matching the material to the environment is essential.
b) Using Incorrect Screws, Nails, or Adhesives
Every ceiling material has a recommended fixing method. Incorrect fasteners may cause the ceiling to loosen or fall over time.
Examples of mistakes:
- Using generic screws instead of manufacturer-approved fasteners
- Relying only on adhesive for heavier panels
- Overdriving screws, damaging board integrity
Secure fixing = longer ceiling life.
c) Wrong Board Orientation
Many people don’t realize boards have a “grain direction” and must be installed perpendicular to framing channels for strength. Incorrect orientation causes cracks and flexing.
3. Structural & Framing Mistakes
A ceiling is only as strong as the structure behind it. Most visible problems—sagging, cracking, or uneven surfaces—come from poor framing.
a) Misaligned or Uneven Metal Framing
If metal channels aren’t perfectly level, the entire ceiling surface becomes uneven. Even a slight tilt becomes visible when lights are installed.
Good installers use:
- Spirit levels
- Laser levels
- Tight channel spacing
- Secure anchor fasteners
Avoid installers who eyeball the alignment.
b) Inadequate Ceiling Support & Suspension
False ceilings require suspension wires or hangers at regular intervals. When spacing is too wide or supports too few, ceilings begin to bend or sag—sometimes within months.
This mistake is serious because it:
- Affects structural safety
- Causes visible dips
- Damages the ceiling board
c) Ignoring Load-Bearing Limits
False ceilings have a weight limit. Heavy chandeliers, fans, or decorative panels require reinforcement. Overloading without support can lead to cracks or collapse.
4. Jointing, Seams & Finishing Issues
Your ceiling may be structurally perfect, but poor finishing ruins its look completely.
a) Poor Joint Taping and Compound Application
Improper jointing leads to:
- Visible seams
- Hairline cracks
- Bumpy textures
- Uneven paint absorption
Correct jointing requires multiple layers of compound with proper feathering.
b) Over-Sanding or Under-Sanding
Over-sanding weakens the board and exposes paper layers. Under-sanding leaves rough patches that stand out after painting. Proper sanding ensures a smooth, flawless surface.
c) Incomplete Surface Preparation Before Painting
Dusty or uneven surfaces prevent paint from adhering properly. This leads to peeling and patchy finishes. The ceiling must be cleaned, primed, and inspected before paint application.
For more information on services and installation tips, check out our full ceiling guide.
5. Lighting Errors During Installation
Lighting is inseparable from ceiling design. Many mistakes occur because lighting is treated as an afterthought.
a) Incorrect Lighting Cutouts
Cutting holes after installation often damages the board and creates imperfect edges. These openings must be pre-measured and cut before the boards are fixed.
b) Installing Lighting After Finishing Work
Lighting wiring should be done before the ceiling is closed. Cutting into an already finished ceiling creates cracks, dust issues, and weakens the installation.
c) Wrong Light Placement Causing Shadows
Lights placed in the wrong positions can highlight imperfections or create unpleasant shadow zones, making the room feel smaller.
6. Moisture, Expansion & Temperature Issues
Every ceiling material expands, contracts, or reacts to weather conditions.
a) Ignoring Expansion Gaps
Ceiling panels require small expansion gaps to adjust to temperature changes. Without these, boards begin to crack or warp.
b) No Vapor Barrier in Moisture-Prone Areas
Rooms with humidity—especially attached bathrooms—require waterproofing or vapor barriers. When this is skipped, ceilings deteriorate quickly.
c) Using Wrong Materials in Hot or Humid Climates
Heat and moisture react with ceiling materials. Choosing the right board type based on climate ensures longevity.
7. Aesthetic Design Mistakes in Small Rooms
Small bedrooms need ceiling designs that maximize space.
a) Over-Designing the Ceiling
Too many layers, borders, or heavy trims create a cramped feeling.
b) Using Dark Colors on Low Ceilings
Dark ceiling colors visually lower the roof and make the room feel smaller.
c) Poor Lighting Design
Incorrect lighting placement casts shadows, distorting room perception.
A simple, light-colored, well-lit ceiling works best for compact bedrooms.
8. Long-Term Maintenance Mistakes
Even after the ceiling is installed, maintenance decisions impact its life.
a) Using Materials Unfit for Long-Term Conditions
A material may look good initially but fail after a few seasons if it’s not suited to the local environment.
b) Ignoring Minor Cracks or Early Signs of Sagging
Early maintenance prevents larger issues. Checking the ceiling every 6–12 months helps identify problems like moisture damage or structural shifts.
9. When to Hire a Professional Instead of DIY
While DIY ceiling installation seems cost-saving, it often leads to costly repairs later. Professional installers bring:
- Precision tools
- Experience with different materials
- Correct measurement and layout skills
- Knowledge of electrical and structural integration
If you’re unsure about framing, wiring, load calculation, or finishing—hire an expert.
Conclusion
Ceiling installation mistakes are common, but they’re entirely avoidable with proper planning, the right materials, skilled workmanship, and regular maintenance. Whether you’re working with gypsum, POP, PVC, wood, or a full false ceiling setup, understanding these errors helps you achieve a flawless, long-lasting ceiling.
By avoiding the planning, structural, material, lighting, and finishing mistakes listed above, you ensure your small bedroom ceiling not only looks beautiful but performs reliably for years. When in doubt, working with experienced professionals is the safest route.